はじめに
ギャラリーの例
RinUI リポジトリのリリースページからギャラリーのサンプルプログラムをダウンロードし、実行することで RinUI の基本的な機能を体験できます。
インストールとテスト
Python
pip (PyPi) を介して RinUI をインストールできます:
TIP
インストール前に、Python の仮想環境を構築することをお勧めします。
bash
pip install RinUI次に、RinUI パッケージを QML プロジェクトと Python コードにインポートして使用を開始できます:
qml
import QtQuick
import QtQuick.Controls
import QtQuick.Window
import RinUI  // 既存のプロジェクトにこのライブラリをインポートするだけ


Window {
    width: 640
    height: 480
    visible: true
    title: qsTr("Hello World")

    Row {
        anchors.bottom: parent.bottom
        anchors.horizontalCenter: parent.horizontalCenter
        anchors.margins: 16
        spacing: 4
        Button {
            highlighted: true
            text: qsTr("Click me!")
            onClicked: dialog.open()

            Dialog {
                id: dialog
                modal: true
                title: qsTr("Dialog")
                Text {
                    text: qsTr("This is a dialog.")
                }
                standardButtons: Dialog.Ok | Dialog.Cancel
            }
        }
        Button {
            text: qsTr("Button")
        }
    }
}
python
import sys
from PySide6.QtWidgets import QApplication
import RinUI
from RinUI import RinUIWindow
if __name__ == '__main__':
print(RinUI.__file__)
app = QApplication(sys.argv)
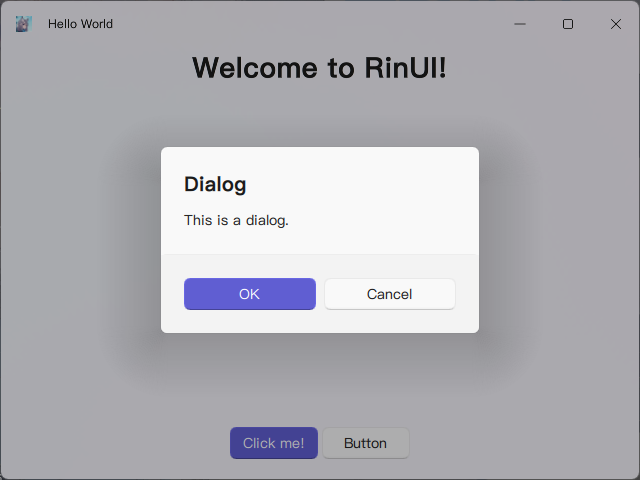
gallery = RinUIWindow("main.qml")
app.exec()最後に、次のような効果が表示されるはずです:
さらなる探求…
- QML で一般的なコントロールを使用する方法を学ぶ;
- RinUI をインストールし、プロジェクトにインポートする;
- RinUI ギャラリーのサンプルプログラムを実行してみる;
- RinUI のドキュメントを読んで、その機能について学ぶ。